this article is to share how to replace the battery for an HP Pavilion X360. You may need to replace the battery if you notice that your battery can’t keep a charge or if it expands.
Replacing the battery in an HP x360 laptop can be a bit challenging and may require some technical expertise. If you are comfortable with disassembling electronics and have experience handling computer components, you can follow these general steps to replace the battery in an HP x360 laptop.

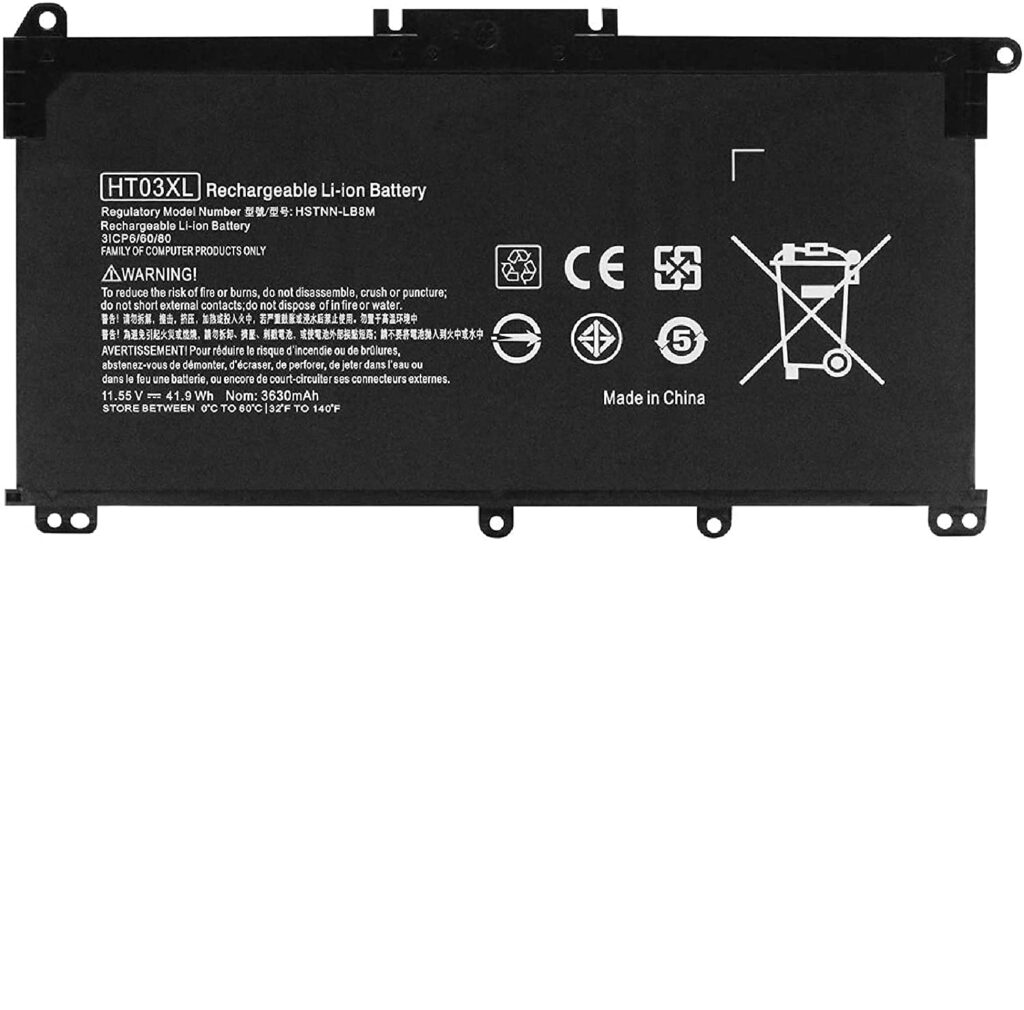
Before starting the battery replacement process, ensure you have the correct replacement battery that is compatible with your specific HP x360 laptop model.
- Prepare the Laptop:
- Turn off the laptop and disconnect it from any power source.
- Close the laptop lid and flip it upside down on a clean and static-free surface.
- Remove the Back Cover:
- Use a small Phillips-head screwdriver to remove the screws holding the back cover in place. Keep track of the screws as you remove them, as they may be of different lengths.
- Gently pry open the back cover using a plastic spudger or a similar tool. Be cautious not to damage the cover or any internal components.
- Locate the Battery:
- Once the back cover is removed, you should be able to locate the battery easily. It will be a rectangular or square-shaped component with a connector leading to the motherboard.
- Disconnect the Battery:
- Carefully disconnect the battery connector from the motherboard. Use a spudger or your fingers to gently unplug the connector. Be gentle and avoid applying too much force.
- Remove the Battery:
- Depending on the model, the battery might be held in place with screws or adhesive. If screws are present, remove them and then gently lift the battery out of its compartment.
- If the battery is held in place with adhesive, use a plastic spudger to carefully pry it loose. Take your time to avoid damaging any other components.
- Install the New Battery:
- Take the new battery, ensuring it’s the correct replacement for your laptop model.
- If the battery comes with adhesive, remove the protective covering and carefully place it into the battery compartment. If screws are used, align the new battery properly and secure it with the screws.
- Reconnect the Battery:
- Attach the battery connector to the motherboard. Make sure it’s properly seated, and there are no bent pins or misalignments.
- Replace the Back Cover:
- Carefully align the back cover with the laptop body and gently press it into place. Make sure it snaps into place correctly.
- Secure the back cover by reinserting and tightening all the screws you removed earlier.
- Power On and Test:
- Once everything is reassembled, plug in your laptop, and turn it on to check if the new battery is working correctly.
- Verify that the battery is charging and recognized by the operating system.
Please note that laptop disassembly and battery replacement may void the warranty, and it’s generally recommended to have such replacements done by authorised service providers or experienced technicians. If you are not confident in performing these steps, it’s best to seek professional help to avoid any potential damage to your laptop.
After all, there can be an internal hardware issue with the device that is beyond your scope. Reformtech has a team of expert and experienced super techies who have worked on several Laptop and are adept at repairing Laptop problems fast. We use only genuine Apple parts when it comes to any replacement and provide excellent services at an affordable price.
ReformTech is a highly reliable Laptop and Smartphone repair service provider that offers on-site repairs for various brands. We specialise in fixing hardware issues, including screen replacements, keyboard replacements, RAM upgrades, SSD upgrades, and even motherboard repairs. Contact us at 8100257620 for fast and efficient service.