An aging or battered laptop display may suffer a flickering image, dead pixels, or a dim backlight. Surface scratches can further degrade the image and a dented or warped case may pinch the display causing bright spots. Eliminate these flaws with a replacement LCD display assembly. Replacing the screen on a MacBook Air A2681 (13-inch, M2 chip model) is a complex process that requires disassembling several internal components. The screen assembly is a crucial part of the device, and the procedure involves delicate handling.
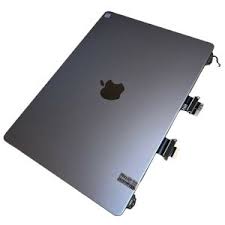
Table of Contents
Tools and Materials Needed
- Replacement screen assembly compatible with the MacBook Air A2681.
- Pentalobe screwdriver (P5) – for removing the bottom case screws.
- Torx screwdrivers (T3, T5) – for internal screws.
- Plastic spudger or opening tool – for disconnecting cables and lifting components.
- Tweezers – for handling small screws and connectors.
- Suction cups – to help lift the screen assembly.
- Anti-static wrist strap (recommended) – to prevent electrostatic discharge.
Remove the Bottom Case
Completely shut down your MacBook Air and unplug it from any power sources or peripherals. Use the Pentalobe screwdriver to remove the screws securing the bottom case. Carefully lift the bottom case using a spudger or opening tool and set it aside.
Disconnect the Battery
Use a plastic spudger to carefully disconnect the battery connector to prevent any electrical damage during the repair.
Disconnect the Display Cables
Locate the display cables connected to the logic board. These are typically covered by metal shields.Use a Torx screwdriver to remove the screws securing the cable shields.Gently disconnect the display cables from the logic board using a spudger. Be careful, as these cables are delicate.
Remove the Screen Assembly
The screen assembly is secured by the hinge screws.Use a Torx screwdriver to remove the screws securing the hinges to the MacBook’s body.Once all screws are removed, carefully lift the screen assembly away from the body of the MacBook Air. Be cautious, as the hinges might still be slightly attached. Gently work them free.
Install the New Screen Assembly
Align the new screen assembly with the body of the MacBook Air.Carefully reattach the hinges to the MacBook’s chassis using the Torx screws.Reconnect the display cables to the logic board and secure them with the metal shields.
Carefully place the bottom case back onto the MacBook Air and secure it with the Pentalobe screws.Power on your MacBook Air and test the new screen to ensure it is functioning correctly. Check for any display issues such as dead pixels, discoloration, or connection problems.Use an anti-static wrist strap to prevent damaging any internal components with static electricity.
We hope our customers are confident that they are getting the best deal on their repair. We have a low price guarantee that promises that if you can find a lower advertised price for the same repair, we will match and beat that price. Our standard warranty is valid at Reformtech, protecting your device no matter where you need us. Description looking to repair your MacBook Air & Pro? We Can Fix It, From MacBook Air & Pro Screen Replacement, Battery Replacements, Keyboard & Case, Adware Removal and More. Don’t let your productivity suffer because of a broken device, and we can get your MacBook Air & Pro back up and running in no time and for the lowest price around.
ReformTech is a highly reliable Laptop and Smartphone repair service provider that offers on-site repairs for various brands. We specialise in fixing hardware issues, including screen replacements, keyboard replacements, RAM upgrades, SSD upgrades, and even motherboard repairs. Contact us at 8100257620 for fast and efficient service.