iPhone XR Keeps Searching for Signal Due to Motherboard Electricity Leakage Issue

Table of Contents
Cosmetic Inspection
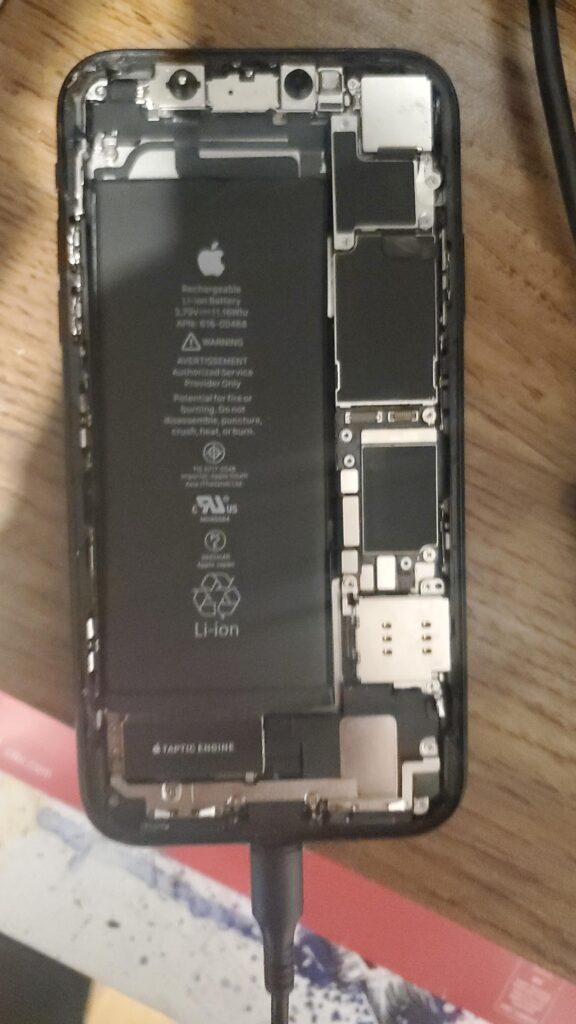
To begin diagnosing the issue, we conduct a thorough cosmetic inspection of the motherboard. The motherboard is neither deformed nor water-damaged, which suggests that the problem does not stem from physical damage or liquid exposure. With this preliminary check completed, we proceed to assemble the phone for further testing.
Initial Testing
We install the motherboard and connect the display assembly. Next, we connect the battery connector to the DC power supply. Observing the ammeter, we note a current reading of 116mA, which strongly indicates that the motherboard is leaking electricity.
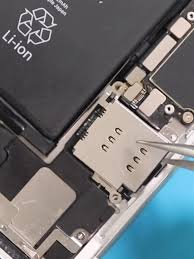
To further diagnose the problem, we insert a SIM card and press the power button. The phone turns on normally. Navigating to Settings > General > About, we confirm that the ICCID and IMEI numbers are visible, verifying that the SIM card is being recognized. However, despite this, the phone continues searching for a signal. Since the baseband circuit appears to be functioning properly, the issue is likely related to the signal power amplifier circuit.
Locating the Fault
To investigate further, we disconnect the power supply, remove the motherboard, and reconnect the battery connector to the DC power supply. The current reading now shows 117mA, confirming persistent leakage.
Placing a hand on the motherboard, we identify that the No Signal power amplifier area is generating excessive heat. This observation directs us to remove the shielding cover for a closer look.
Removing the Shielding Cover
We first peel off the dust-proof sponge on the board and attach the motherboard to a PCB Holder. To facilitate easier removal of the shielding cover, we apply low-temperature solder paste along its edges. We also protect surrounding connectors by applying high-temperature tape.
Using a QUICK 990AD Hot Air Gun set to 400℃ with an airflow setting of 3, we heat the four edges of the shielding cover. Once the solder softens, we carefully pry the cover off using tweezers.
Identifying the Burnt Power Amplifier IC
Removal of the shielding cover, we discover that the power amplifier IC U_QET_E has burnt out. To address this, we clean the area using PCB Cleaner and proceed with the replacement process.
Replacing the Power Amplifier IC
We first apply paste flux to U_QET_E and use the hot air gun at 360℃ with an airflow setting of 3 to carefully remove the burnt IC. we find that both U_QET_E and its bonding pad are significantly damaged.
To prepare for a new IC, we clean the bonding pad with soldering iron at 365℃ and then heat it with the hot air gun at 360℃. We further clean the area using rosin-soaked solder wick followed by PCB Cleaner.
Repairing Burnt Circuits
Examining the bonding pad, we find that Pin C2 and Pin D2 are burnt. These pins are responsible for the PP_VDD_MAIN power supply. Since their relevant circuits are also damaged, we need to establish new connections using jumper wires.
- Apply UV curable solder mask to Pins C2 and D2 and solidify under a UV lamp for 2 minutes.
- Flatten the surface using a sculpture knife.
- Apply paste flux to C1208.
- Use 0.02mm enameled copper wire to connect C1208 to Pins C2 and D2. One end is soldered to C1208 with a soldering iron at 365℃.
- The other end is carefully looped and soldered around Pins C2 and D2.
- Apply another layer of UV curable solder mask to the wire and solidify under a UV lamp for 2 minutes.
- Scrape out the circuit using the sculpture knife to ensure connectivity.
Installing the New Power Amplifier IC
With the circuit repaired, we proceed with installing a new power amplifier IC:
- Apply paste flux to the bonding pad.
- Position the new power amplifier IC correctly.
- Use the QUICK 990AD Hot Air Gun at 360℃, airflow 3, to solder the new IC.
- Allow the motherboard to cool for 5 minutes.
- Clean thoroughly with PCB Cleaner.
Final Testing & Reassembly
Once the repairs are completed, we reconnect the iPhone XR motherboard to the DC power supply. This time, the current reading on the ammeter is normal, indicating that the motherboard is no longer leaking electricity.
Proceeding with reassembly:
- Install the motherboard and reconnect the display assembly.
- Connect the battery.
- Insert the SIM card.
- Power on the phone.
The phone boots up normally, and the signal bars in the upper-right corner appear stable and functional. The issue No Signal has been successfully resolved.
iPhone XR Keeps Searching for Signal
If you see SOS in the status bar, your device can still make emergency calls. If you see No Service or Searching in the status bar on your iPhone or iPad (Wi-Fi + Cellular), your device isn’t connected to a mobile network.
Conclusion & Final Notes
This repair effectively addressed the iPhone XR “Searching for Signal” issue caused by a burnt power amplifier IC and motherboard electricity leakage.
Warm Tips:
- Always confirm that the issue is completely resolved before final assembly.
- Ensure that the motherboard has cooled down before further handling.
- Properly secure all shielding covers and insulation layers after repairs.
This completes the repair process, and the iPhone XR now functions normally.
ReformTech is a highly reliable Laptop and Smartphone repair service provider that offers on-site repairs for various brands. We specialise in fixing hardware issues, including screen replacements, keyboard replacements, RAM upgrades, SSD upgrades, and even motherboard repairs. Contact us at 8100257620 for fast and efficient service. Best Service in Kolkata in Behala Chowrasta with guaranteed quality. 📱🔧 #Reformtech #AppleMobileRepair #BestServiceInKolkata #iPhoneRepair iPhone service center.