iPad 9th Gen(10.2″, 2021) LCD Display & Touch Screen Digitizer Replacement Guide
Replacing the LCD display and touch screen digitizer on the iPad 9th Gen (2021, 10.2-inch) model requires care, precision, and the right tools. In this guide, we walk you through the step-by-step repair process, including how to remove and replace the broken screen, detach the Touch ID home button, and properly install the new components. Whether you’re a technician or a DIY enthusiast, this repair guide covers all the essential details.
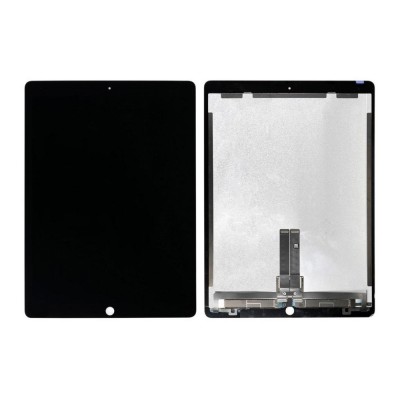
Table of Contents
🔧 Tools & Materials You’ll Need:
- Tablet/Mobile heating pad (or heat gun/hairdryer)
- Suction cup
- Plastic card pry tool or triangle pick
- Phillips #000 screwdriver
- Tweezers
- Nylon spudger or plastic pry tool
- B7000 adhesive or double-sided adhesive strips
- Replacement LCD & digitizer (with or without home button)
- Screen bonding clips or rubber bands
⚠️ Before You Start:
Make sure your iPad is powered completely off to prevent short circuits. Back up your data if possible, and set your tools on a clean, static-free work surface.
🔥 Step 1: Heating the Front Panel
Begin by heating the front side of the iPad. Proper heat softens the strong adhesive holding the screen to the frame.
- Use a tablet heating pad, set to tablet mode, and place the iPad screen-side down for a few minutes until thoroughly heated.
- Alternatively, a heat gun or hairdryer can be used, but move it constantly and avoid overheating.
🛠️ Step 2: Separating the Screen iPad 9th Gen
- Once heated, place a suction cup near the edge of the screen to lift it slightly.
- Insert a plastic card or triangle pick into the gap and carefully slide it around the edges to break the adhesive seal.
- Be gentle near the bottom-right and top-right areas – the digitizer flex cables are connected here.
📖 Step 3: Lifting the Touch Screen
- Lift the screen like opening a book from left to right.
- Keep it open and flat like a book—do not pull it completely off yet. The LCD is still connected underneath.
🔧 Step 4: Removing the iPad 9th Gen LCD Screen
- Remove any tape or stickers covering the screws.
- Unscrew the four screws holding the LCD in place.
- Gently lift the LCD from the top to a 90-degree angle (don’t force it).
- Unscrew and remove the metal shield protecting the LCD connector and unplug the flex cable underneath.
🔌 Step 5: Disconnecting the Touch Screen
- Disconnect the two digitizer flex cables.
- Carefully peel back the tape covering the Touch ID (home button) flex cable, then raise the tab to release the connector.
At this point, the touch screen digitizer assembly can be completely removed.
🧩 Step 6: Transferring the Home Button (If Needed)
If your replacement digitizer does not include the home button and flex cable:
- Apply light heat around the home button area to soften the glue.
- Gently push the button from the front, and use a pry tool to peel back the flex cable without tearing it.
- Transfer the button and cable onto the new digitizer screen, making sure it’s aligned and securely attached.
🧪 Step 7: Installing the iPad 9th Gen New Screen
- Reconnect both digitizer connectors and the home button flex.
- Align and install the new LCD panel and secure it using the original four screws.
- Reconnect the LCD flex and reinstall the shield with its screws.
🧴 Step 8: Sealing the iPad 9th Gen
- Make sure the adhesive frame around the body is intact. If not, apply B7000 glue or pre-cut double-sided adhesive.
- Close the iPad 9th Gen like a book, starting from the bottom edge, then the top, and finally pressing the sides evenly.
- Press firmly around the edges, especially near the home button, to ensure a proper seal and alignment.
🔒 Step 9: Final Touch
- Use screen bonding clips around the edges, or wrap rubber bands around the iPad 9th Gen to keep pressure applied evenly while the adhesive sets.
- Leave it for 30–60 minutes for best bonding results.
✅ Conclusion
Congratulations! You’ve successfully replaced the LCD and touch screen digitizer on your iPad 9th Gen (10.2-inch, 2021). Take your time during each step to avoid damaging delicate components like the home button or flex cables. Always test the new screen before final sealing, if possible.
“Looking for expert Apple mobile repair? At Reformtech, we provide top-notch iPhone repair services in Behala Chowrasta, Kolkata—whether it’s screen repair, battery replacement, or other issues, we guarantee quality service! 📱🔧
We also specialize in laptop and smartphone repairs, including screen replacements, keyboard fixes, RAM & SSD upgrades, and motherboard repairs for various brands.
📞 Contact us at 8100257620 for fast & reliable service!
#Reformtech #AppleMobileRepair #iPhoneRepair #MacBookRepair #LaptopService #BestRepairService #AppleServiceCenter”