MacBook A1990 No Power Repair
Table of Contents
Initial Diagnosis
A MacBook Pro A1990 arrived at our service center with a “No Power” issue. The customer reported that the laptop was functioning normally when it suddenly shut down and refused to turn back on. After noting the symptoms, we categorized the issue as a “Power Failure,” possibly linked to an overheating problem. Resetting the SMC can sometimes fix problems with charging and turning on your Mac. To reset the SMC on your MacBook Pro A1990, follow these steps: Shut down your Mac. Hold down the Shift, Control, and Option keys, and then press and hold the power button.
Step 1: Checking DC Ampere Flow
The first step in diagnosing the problem was checking the DC ampere reading to determine if the voltage was switching between 5V and 20V. Observations revealed that there was no 5V-20V switching present. This absence indicated a potential issue in the power delivery system, possibly affecting the PP Bus, which converts 20V to various voltage levels (12V, 14V, or 8V) to distribute power across the board.
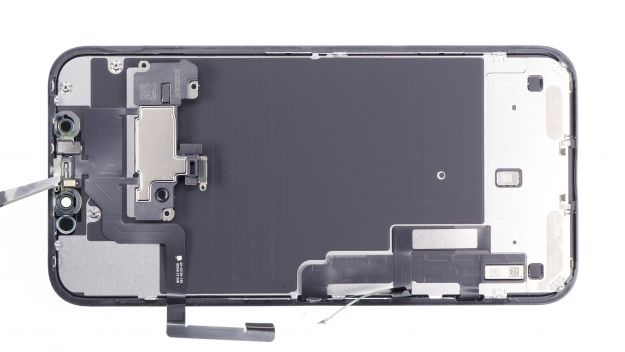
Step 2: Disassembling the MacBook
To proceed further, we carefully disassembled the laptop, ensuring we followed proper procedures to avoid damaging internal components. We used a suction pump to lift the front panel and gently pushed the laptop forward to detach the back panel. we immediately noticed a significant amount of dust and moisture inside the system.
Step 3: Physical Inspection
Before cleaning the MacBook Pro A1990, we performed a detailed physical inspection. Moisture accumulation and dust buildup are common culprits in power failure cases, often leading to corrosion or short circuits in capacitors and resistors. However, there were no visibly burnt or damaged components upon initial observation.
Step 4: Cleaning the Internal Components
Using specialized cleaning tools, we carefully removed the dust and moisture. Since cleaning without inspecting can dislodge tiny components, we made sure to check the board before and after cleaning. Once cleaned, we revisited our diagnostics.
Step 5: Checking Impedance and Short Circuits
Using a multimeter set to diode mode, we checked for short circuits in different sections of the motherboard, including the CPU core, GPU, and power circuits. No abnormalities were detected in these sections, so we proceeded to check the PP Bus.
Step 6: Identifying a PP Bus Short Circuit
Upon closer inspection of the PP Bus circuit, we found two white fuses regulating voltage flow. The impedance reading for these fuses was significantly low, confirming a short circuit in the PP Bus. This issue commonly affects the NAND chip (SSD) and can lead to a complete system failure if not addressed.
Step 7: Locating the Faulty Component
We removed the shorted fuse and checked both input and output sides to pinpoint the exact location of the short circuit. After applying flux and carefully desoldering the component, we measured impedance again and confirmed the PP Bus was still shorted.
Step 8: Using Thermal Detection Techniques
Since the multimeter readings suggested a short circuit, we used a thermal detection technique to locate the overheating component. Without a thermal camera, we applied thinner to various components and monitored the evaporation speed. One capacitor dried almost instantly, indicating excessive heat generation and confirming it as the faulty component.
Step 9: Removing and Replacing the Faulty Capacitor
We desoldered the faulty capacitor using a soldering iron and applied flux to ensure a clean removal. Once removed, we rechecked the impedance and found that the reading had returned to a normal value (~44.4kΩ), indicating that the short circuit was successfully eliminated.
Step 10: Reassembling and Testing
After replacing the faulty capacitor and reinstalling the fuse, we reassembled the MacBook Pro A1990. Testing the power input, we observed that the 5V-20V switching had been restored. The machine successfully booted up, and the fan started spinning, indicating power was being delivered correctly.
Step 11: Final Verification
We connected the display and confirmed that the Apple logo appeared on the screen, signifying that the system was functional again. The repair was successful, and the MacBook Pro A1990 was restored to working condition.
Conclusion
This case study highlights the importance of a step-by-step approach to diagnosing and repairing MacBook power issues. The issue stemmed from a shorted capacitor in the PP Bus circuit, which was successfully replaced using thermal detection and precise soldering techniques. For more case studies and MacBook Pro A1990 repair insights, stay connected with us.
If you have any pending MacBook repair cases, feel free to reach out to us for assistance. We provide BIOS unlocking, AMD cleaning, and various other repair support services. Join our community for more insights into ReformTech Apple device repairs!
ReformTech is a highly reliable Laptop and Smartphone repair service provider that offers on-site repairs for various brands. We specialise in fixing hardware issues, including screen replacements, keyboard replacements, RAM upgrades, SSD upgrades, and even motherboard repairs. Contact us at 8100257620 for fast and efficient service. Best Service in Kolkata in Behala Chowrasta with guaranteed quality. 📱🔧 #Reformtech #AppleMobileRepair #BestServiceInKolkata #iPhoneRepair iPhone service center.