Removing the display on the iMac 21.5″ A1418 Screen cutting adhesive with a specialized iMac opening tool. Replacing the screen on an iMac A1418 (21.5-inch model) is a challenging task that requires careful handling of the display and internal components. The screen is held in place with strong adhesive, and disassembly involves removing the glass and the LCD panel. If you’re not experienced with electronics repairs, it’s recommended to have this done by a professional.
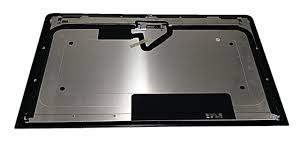
Table of Contents
Tools and Materials Needed
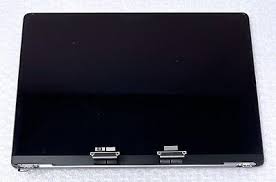
- Replacement screen compatible with the iMac A1418.
- Plastic card or opening tool – to cut through the adhesive.
- Suction cups – to help lift the screen.
- Torx screwdrivers (T8, T10) – for internal screws.
- Plastic spudger – for disconnecting cables.
- Adhesive strips – to reattach the screen after replacement.
- Anti-static wrist strap (recommended) – to prevent electrostatic discharge.
Prepare to Remove the Screen
With the hinge free to move, the iMac will be unbalanced and hard to work on. Repairs can be completed as shown, but are faster and easier with an iMac service wedge.Starting on the left of the display, near the power button, insert the iMac Opening Tool into the gap between the glass panel and the rear enclosure.Place the iMac face-up on a soft surface or use a stand to hold it securely. Attach the suction cups to the upper corners of the glass.
Lift the Screen
Once the adhesive is cut, use the suction cups to gently lift the screen from the iMac’s body. Lift it just enough to access the cables underneath. Use the tool like a pizza cutter—roll it along through the gap, and it will cut the foam adhesive through the center. Be sure to always push with the handle behind the cutting wheel. If you pull, the wheel might get pulled out of the handle. While the opening tool cut most of the adhesive, the display will still be slightly adhered to the case. A plastic card will be necessary to free up the last of this adhesive.
Disconnect the Display Cables
Carefully disconnect the display cables that connect the screen to the logic board. There may be two or three cables, depending on the model. Use the tip of a spudger to flip up the metal retaining bracket on the display data cable.
Connect the New Screen
If your new screen doesn’t come with adhesive pre-applied, apply the adhesive strips around the edges of the screen or the iMac frame where the original adhesive was located. It may be necessary to slowly lift from one side, to peel against the remaining adhesive. Carefully align the new screen with the iMac frame. Press the screen into place, making sure the adhesive makes full contact around the edges.
The complexity and risks involved in replacing the screen on an iMac A1418, it’s recommended to have this done by a professional. We hope our customers are confident that they are getting the best deal on their repair. We have a low price guarantee that promises that if you can find a lower advertised price for the same repair, we will match and beat that price. Our standard warranty is valid at Reformtech, protecting your device no matter where you need us. Description: Looking to repair your MacBook Air & Pro? We Can Fix It, From MacBook Air & Pro Screen Replacement, Battery Replacements, Keyboard & Case, Adware Removal and More.
ReformTech is a highly reliable Laptop and Smartphone repair service provider that offers on-site repairs for various brands. We specialise in fixing hardware issues, including screen replacements, keyboard replacements, RAM upgrades, SSD upgrades, and even motherboard repairs. Contact us at 8100257620 for fast and efficient service.